Here is the promised breakdown for the NW Natural Eggs as mentioned in a previous post..
The workflow for me for this project:
1.) I went on set and took tons and tons of distance measurements. I measured everything I could down to 1/4″ (1/8th” for smaller objects). The purpose of doing this is to recreate the set in 3D. We want to create the set in 3D to make sure the character sizes are correct, that they are the correct distance away from camera, and in the correct space to interact with the real objects around them. We also use the geometry of the set to project the HDRI lighting onto the characters to get correct spatial luminance as opposed to lighting with an infinite ibl. The quick blocked out version looks something like this:
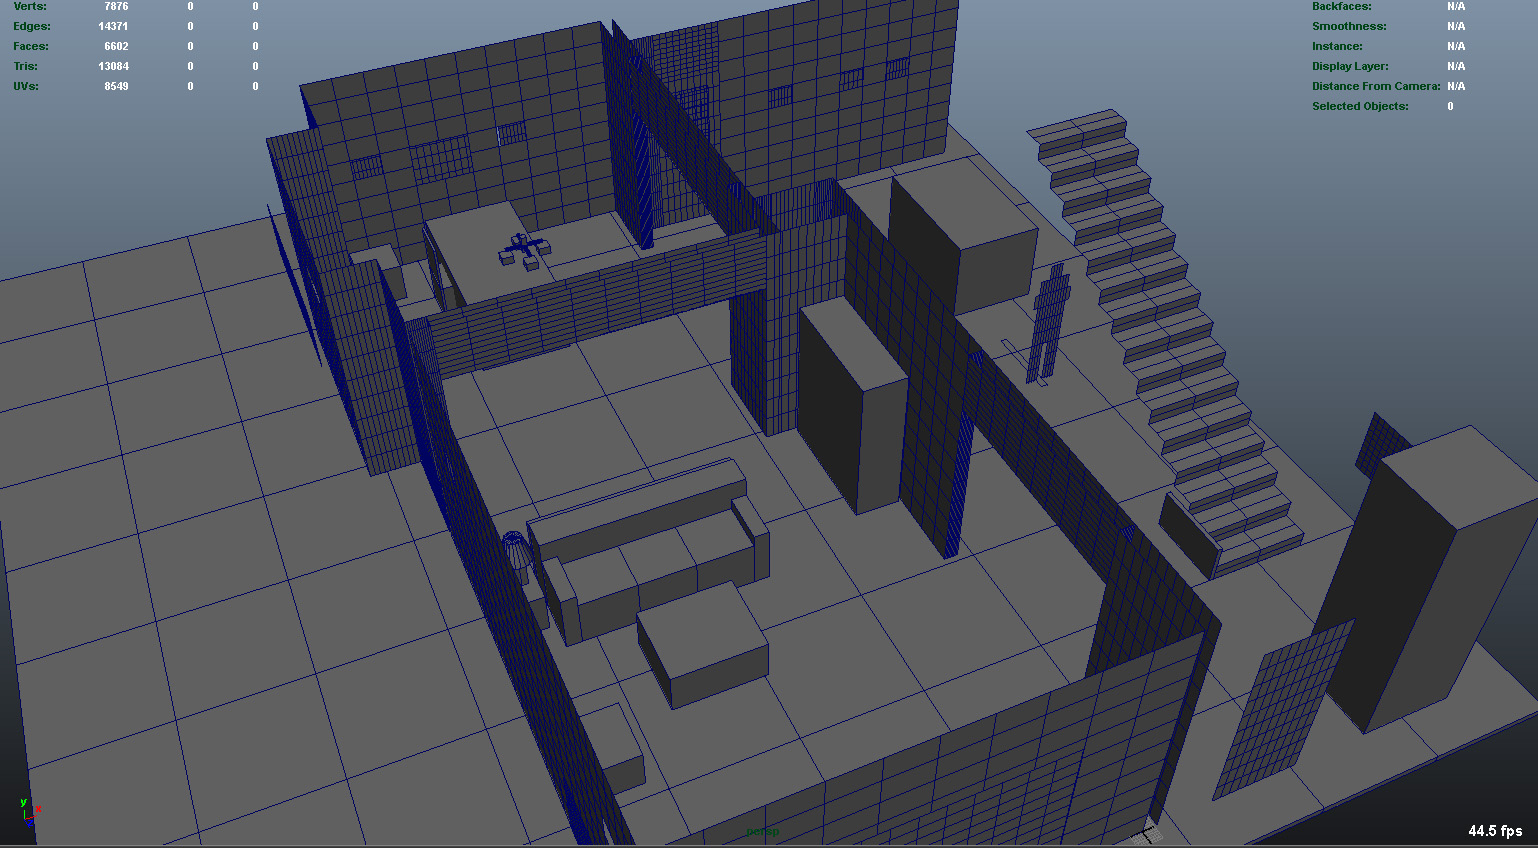 This screen grab is in the middle stage. The key is to keep things clean and simple. Add detail later. As you can see a lot of the walls have way more geometry than they need to. I cleaned this up once I finished the first pass. I started with one 10X10 plane and duplicated it over and over to create all the walls, that way I can visually see the size ratios with the 10X10 grid differences between walls and make sure things were lining up correctly.
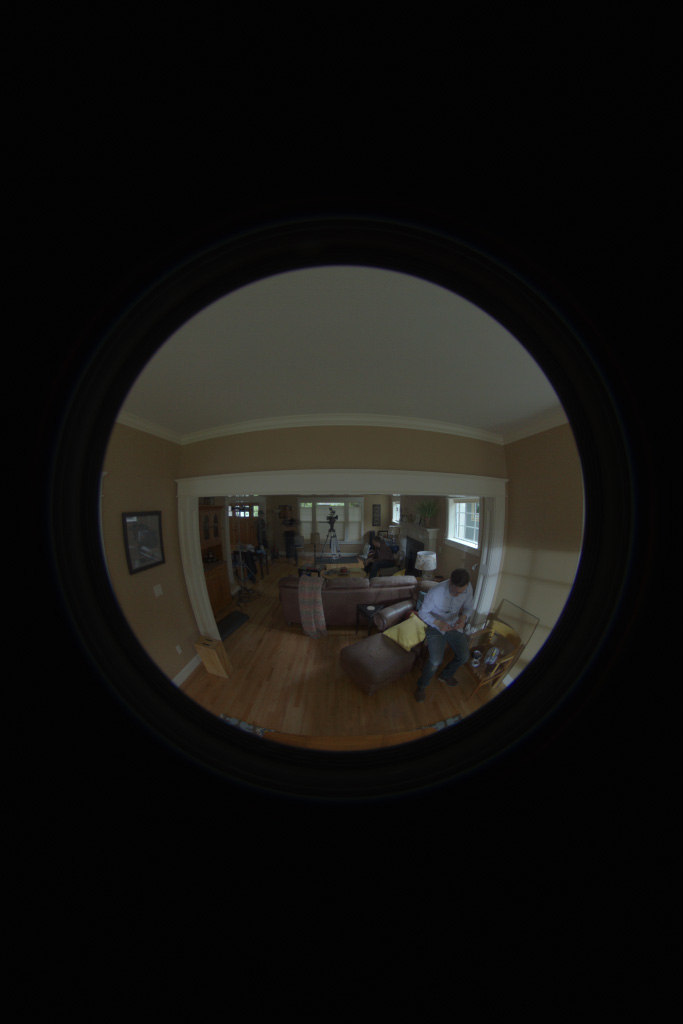
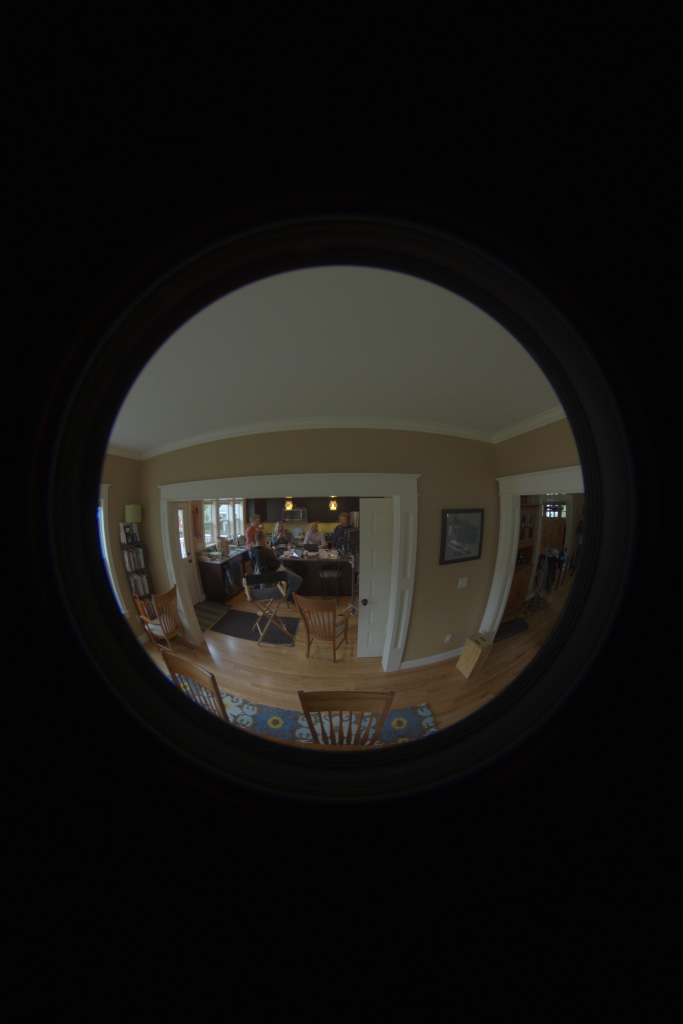
2.) The second stage for me was hdri creation. We took a dynamic range of 6 exposures per shot. We shot 4 around and 1 at the zenith. We really should have done 1 at the nadir, but time was tight. This is generally enough information for indoor lighting situations, but definitely not nearly enough for outdoors with the sun (unless you are planning on deleting the sun and adding it in later). The more exposures, generally the better because you can cover a wider range. We shot our hdri’s with a fisheye on a t2i on a tripod with a nodal offset to make sure we limited the amount of parallax that was going on. With the camera that is shooting the footage, we shot a reference frame of a 50% grey sphere as well as a chrome ball. This helps us light later on. After we shoot the hdri’s, I then take them into Camera Raw and zero out all of the tweaks the camera makes and try to linearized them as best as possible. During this stage, I also remove some camera artifacts such as chromatic abberation. I’ve found that it’s better to do it before the stitch rather than after. After this, I convert them to .tiff’s and combine them into an HDR using Picturenaut. I use picturenaut, because it *appears* to give me the best, artifact free, result. I do have to say I am no expert here, and I came to this only after my own testing and comparing. After doing this we get something sort of like these:


3.) I then stitched these together using the program PTGui. It seems like this is the best one out there. I tried hugin and could not get it to actually do anything but crash. I also tried autopano giga and it couldn’t resolve issues like PTGui can. Autopano does seem to have better tracking abilities with finding points, but it had so many issues actually combining the images that I couldn’t use it. The result is this:
Beautiful right? Just kidding. After we exposure down we get this:
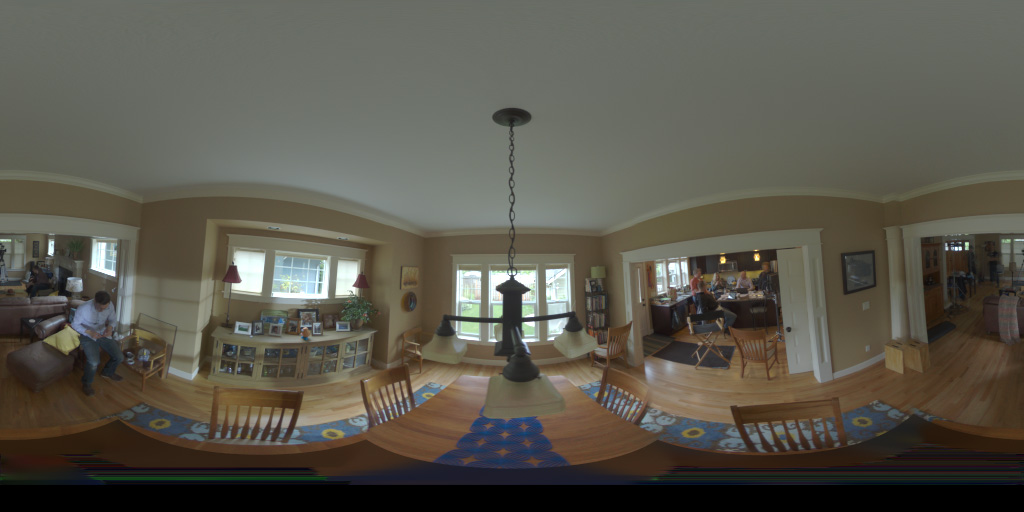
Much better.
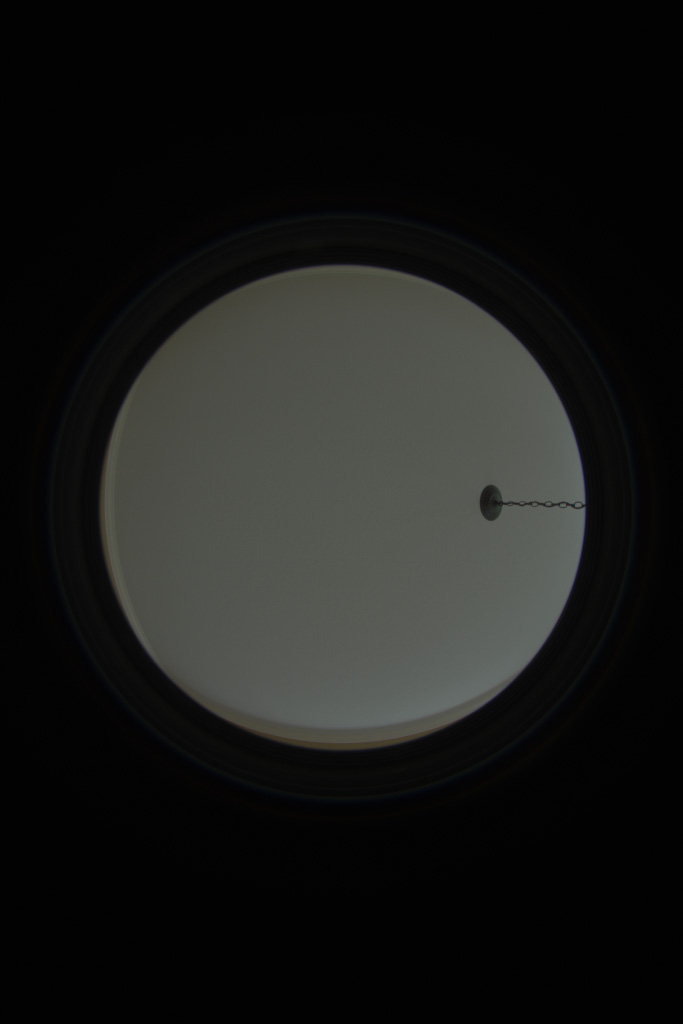
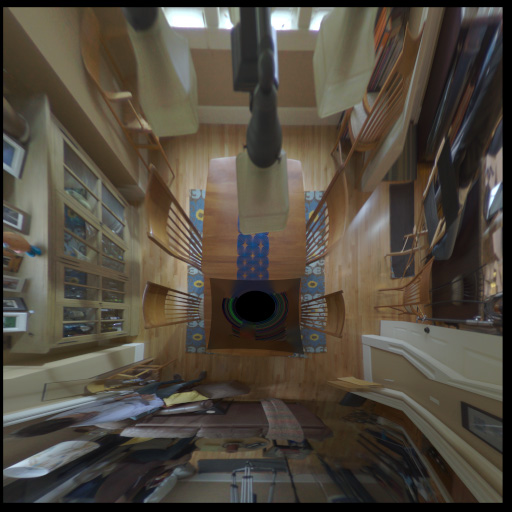
4.) This is the hdr image that I used for the chandelier shot. As you can see there are obvious seam issues. Some things aren’t aligned correctly, distortion is a little funky. But I lined it up to my geometry and it lined up close enough. Also, there aren’t any major reflective surfaces being rendered that will show you the seams and the seams won’t effect the lighting so spending the extra time was not necessary.
5.)The next step is to create a spherical projection texture and move it to where your camera was located. Attach your hdri to it – or a small jpg version of it-for previewing purposes, and align your hdri with your geometry. If you did everything correctly, things should line up nicely. If not, go back to either the measurement or the stitching step and play around a bit more. Once I was satisfied with the position I baked the texture down to the geometry and produced these texture maps: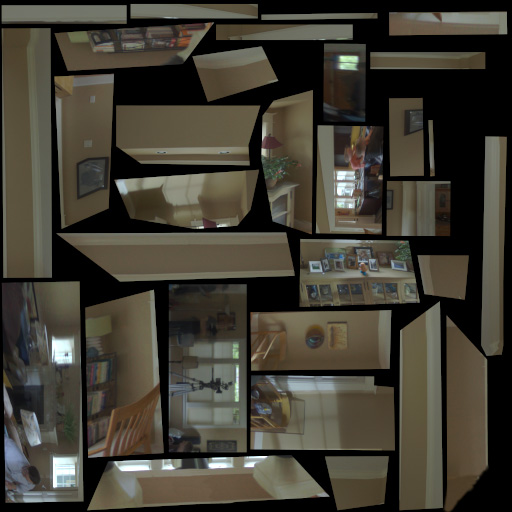

6.)Now the light stage! I brought in a grey sphere and moved it into the same position as the real sphere and I began tweaking the lighting so my grey sphere looks the same as the real sphere… Or as close as I can with the time given. I tweaked the textures with a combination of Photoshop work and color correct nodes in Maya. Some shots I only had to do a little tweaking, but for others, for whatever reason, I had to do a lot more extensive work with exposure and hues. For the refraction in the glasses, I needed to do something a bit special to make sure the refraction matched the color and intensity of what was behind it. To do this, I put a rayswitch before the hdri textures on the geometry and projected the actual plate into the refraction eye rays only and the hdri went into everything else. Here is a comparison between the real grey ball and the cg version:
Real:

CG:
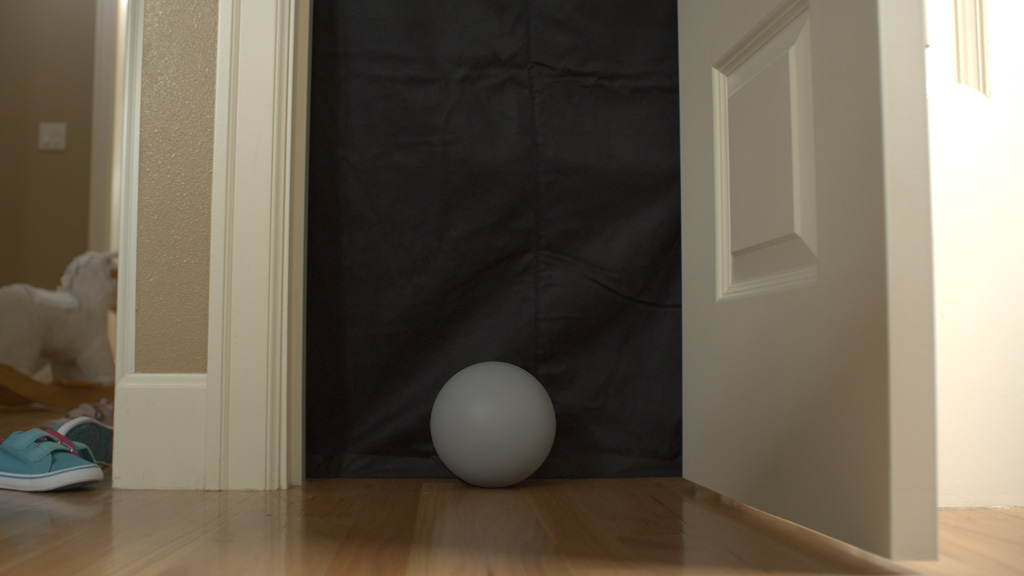
Real:
CG:

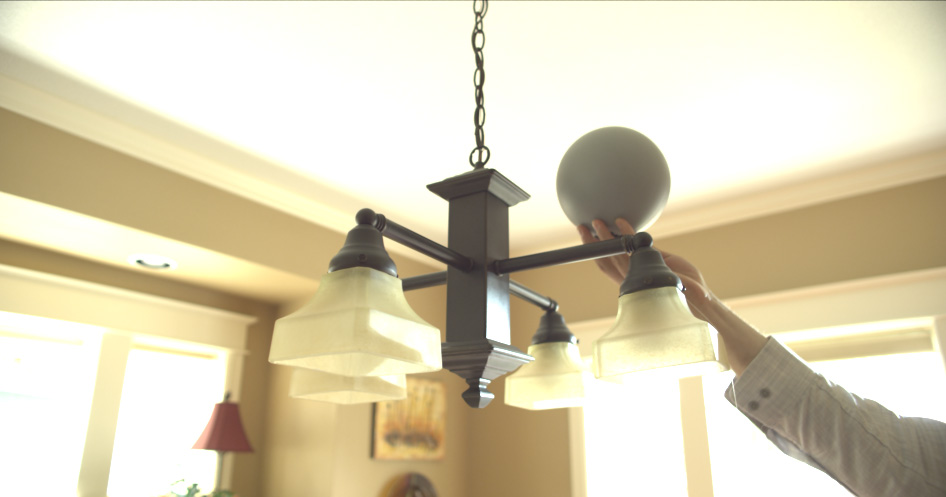
Early Test of Characters in Scene:
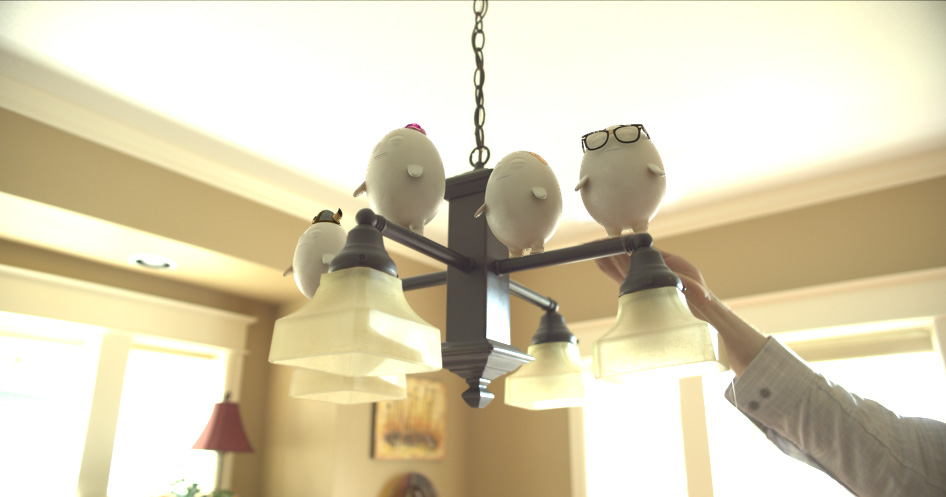
The chandelier posed an interesting problem because we didn’t shoot hdri’s of the chandelier objects itself so we couldn’t accurately compute it’s luminance at all points with a texture. So Instead, I applied materials to it to mimic the real materials and tried to make it look as close as possible as the real thing using the hdr of the scene to light. I had the lighting right, so I should be able to get the chandelier looking close to the real thing and thus giving off correct light bounce. Doing it this way, also automatically gave me he correct occlusion and shadowing onto the eggs. It’s a win win!
Closing thoughts:
Since I was not using ANY lights at all to light the characters, and they were all being lit by final gather and self-illuminated geometry, I obviously came across a lot of final gather flickering. To solve these issues I used a combination of practices.
-Some scenes, all I had to do was tweak the final gather settings, and that was fine.
-There were a couple of scenes where I was able to use brute force fg and be fine.
-Most of the time, however, I needed to use importons + fg. This solved most of the issues.
-The last two shots where the worst. No matter what I did, I still had flicker. I started with render times of 20 minutes and shot through the roof to 20 HOURS a frame to try and fix the fg issue. There was no strong definite light source, and the characters ranged near and far, fast and slow. So I needed to rely on more advanced techniques such as the fg_shooter and placing portal lights in front of more important geo to help MR know where to look. I also ended up increasing the fg quality on a per material basis. This brought the render times down to 2 hours a frames. Much much better.
I didn’t touch on the materials of the eggs because it’s all pretty standard. I used fast skin SSS coupled with the MIA material for diffuse and reflections with a low IOR.
Once the hdr had been created and projected, it took, on average, about 6 hours per shot to finalize the look and lighting of the shot. All in all, I spent about two weeks working on this project from measuring to last render.