Bump mapping is a pain. It’s a pain for many reasons. A couple reasons are. 1.) It’s a fake. It just fakes depth level, so it doesn’t work so well when using gi solutions. (unless it’s a fine fine bump, than it’s not noticeable). 2.)It doesn’t scale well. The latter of the two points is what we will be addressing here.
If you were to bump a bump on any object and render it from far away, and then render it from close up, you would notice that when you are close up, the bump looks much larger than when you are far away. A workaround for this is to just key the value, but this can become a hassle and isn’t very production friendly. An alternative method is to use the distance tool and have it be automated for you.
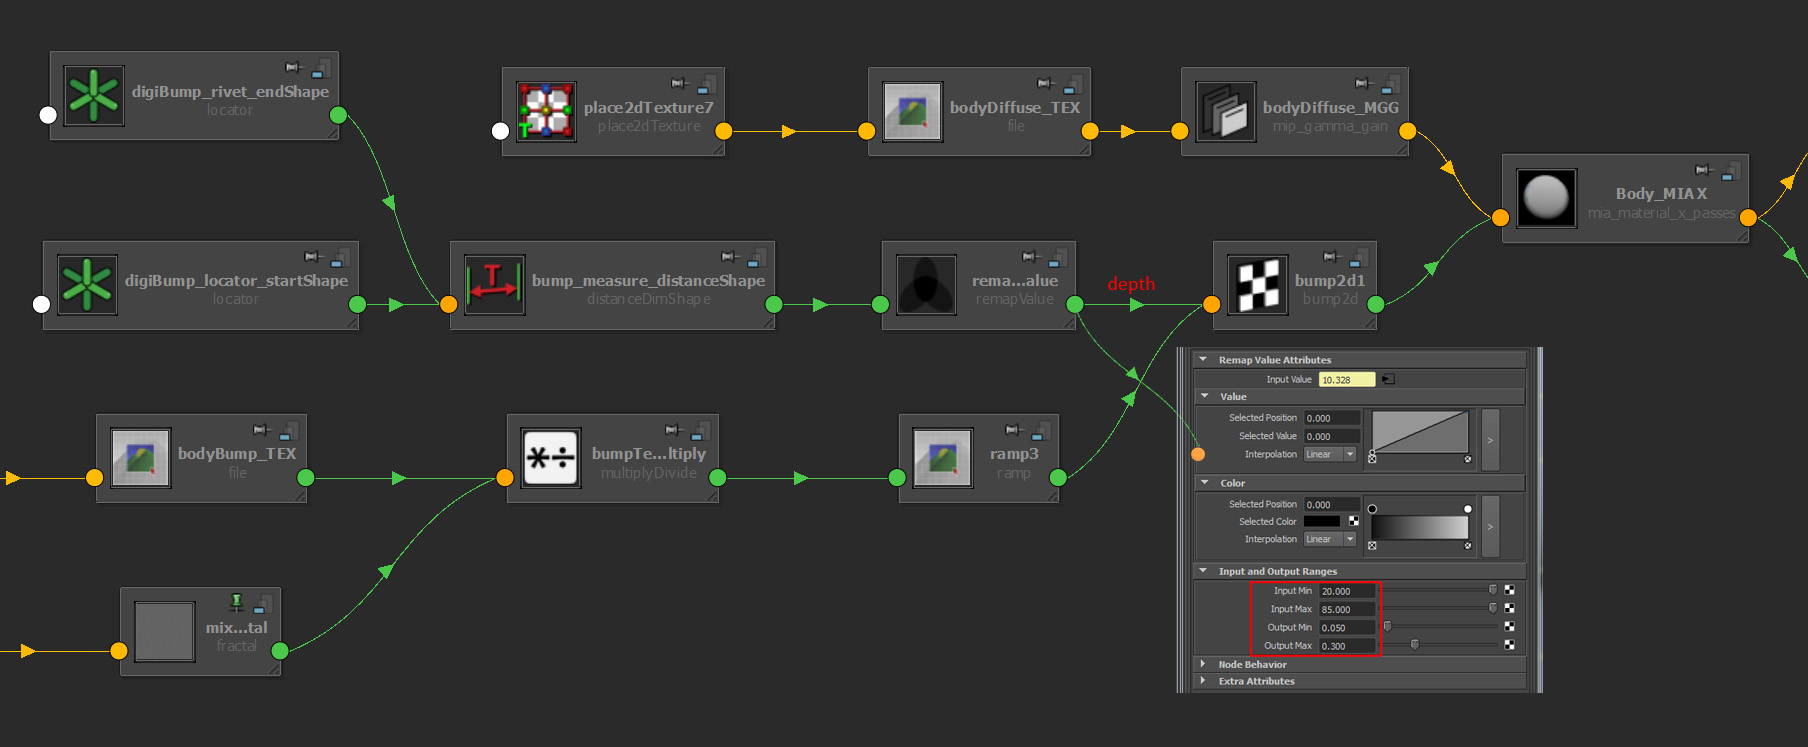
First you create a measure distance tool under the create menu bar. And then you constrain or rivet one part of the locator to your object and the other to the camera. You then plug the distance attrib into the input value of a remapValue node. The input Min is the min. distance that will affect your min bump value. So if your min value is 20 and your camera distance is 20 it will be the min. bump value. If you go under 20, it will still be the min bump value. Input Max is the same thing, just for the max distance. The Output Min is the lowest you want your bump to be and the Output Max is the highest you want your bump depth to be. Check out the screen grab below.
This remapValue then gets plugged into the bump depth value of a bump node.
-
Archives by Category
-
Archives by Month
- May 2014 (2)
- February 2014 (2)
- November 2013 (1)
- October 2013 (1)
- September 2013 (2)
- August 2013 (4)
- July 2013 (2)
- June 2013 (1)
- May 2013 (1)
- January 2013 (2)
- September 2012 (2)
- August 2012 (5)
- July 2012 (1)
- October 2011 (2)
- September 2011 (3)

Thanks very much! I’ve been looking for a workflow dealing with camera based bump map values fora while. *high five*
Awesome! Glad this helped! Let me know if you have any questions or issues, good luck!